
Description
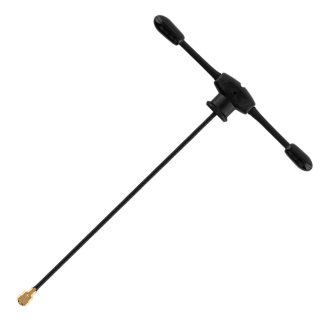
FrSky XM+ / XM PLUS Mini Receiver is the upgraded version of the ever-popular XM receiver from FrSky. Compared to the XM receiver, the XM+ has the addition of a diversity antenna.
It supports 16 channels over SBUS, failsafe and full range, the XM Plus is compatible with FrSky’s D16/EU LBT mode found on multi-protocol Radio Transmitters.
It is an ideal receiver to be used as a redundant receiver along with other Frsky Receivers like R-XSR and RX8R PRO.
NOTE: Please let us know if you want us to install the 3-pin header for you.
Features
- Ultra-light receiver ONLY 1.6g
- 16 Channels
- Full range
- Firmware upgradeable
- RSSI output on CH16
- D16 mode compatible
Specifications
- Channels: 16Ch (S.Bus) (1-15ch for PWM,16ch RSSI for Flight Controller)
- Voltage: 3.7 ~ 10V
- Operating Current: 30mA @ 5V
- Full Range
- Compatibility: FrSky D16 mode
- Dimension: 21.5 x 12 x 3.5mm
- Weight: 1.6g
Included:
- 1x FrSky XM+ SBUS Mini Receiver EU LBT
- 2x 3-pin headers (1 right angle, 1 straight)
- 1x Heat Shrink tubing (only @OriginHobbies)
Binding procedure
A) Roll back Multi-Module RF firmware to v1.3.3.20 as later versions have issues binding with XM+ (Multi-protocol Firmware issue #987)
- Download Multi-module firmware v1.3.3.20
https://github.com/pascallanger/DIY-Multiprotocol-TX-Module/releases/download/v1.3.3.20/mm-stm-serial-aetr-v1.3.3.20.bin - Copy it to the Firmware directory on the Radio Transmitter’s SD-Card.
- Power up the Radio Transmitter and Flash the firmware into Internal RF module
- Sys->SD-card->Firmware->mm-stm-serial-aetr-v1.3.3.20.bin->Flash Internal Multi
B) Bind TX16S to XM+
- On the Transmitter, Check RF protocol and Receiver ID
MDL->Internal RF
Mode = Frsky X2
RF Protocol = LBT (EU)
Receiver ID = 2 (pick a unique number that is not used in other models on the Radio) - (IMPORTANT) Keep the Radio Transmitter at least 3 feet away from the XM+ during binding and operation.
- Hold BIND button when powering up XM+, release button only after both Red and Green LEDs are lit steady.
- on the Transmitter, press the BIND button and choose “CH 1-8 Telem OFF” if being used as redundant receiver “CH 1-8 Telem ON” otherwise.
- when binding is successful the RED led will start blinking and GREEN remains steady.
- Power off and power on the XM+. Green LED should be blinking at a fast rate. This means receiver is bound correctly to the radio.
C) Restore the Multi-module firmware back to the latest version
- Sys->SD-card->Firmware->4in1-FCC-air-v1.3.4.0->Flash Internal Multi


Reviews
There are no reviews yet.