This article shows you how to replace the internal RF module for TX16S form 4in1 to ELRS.
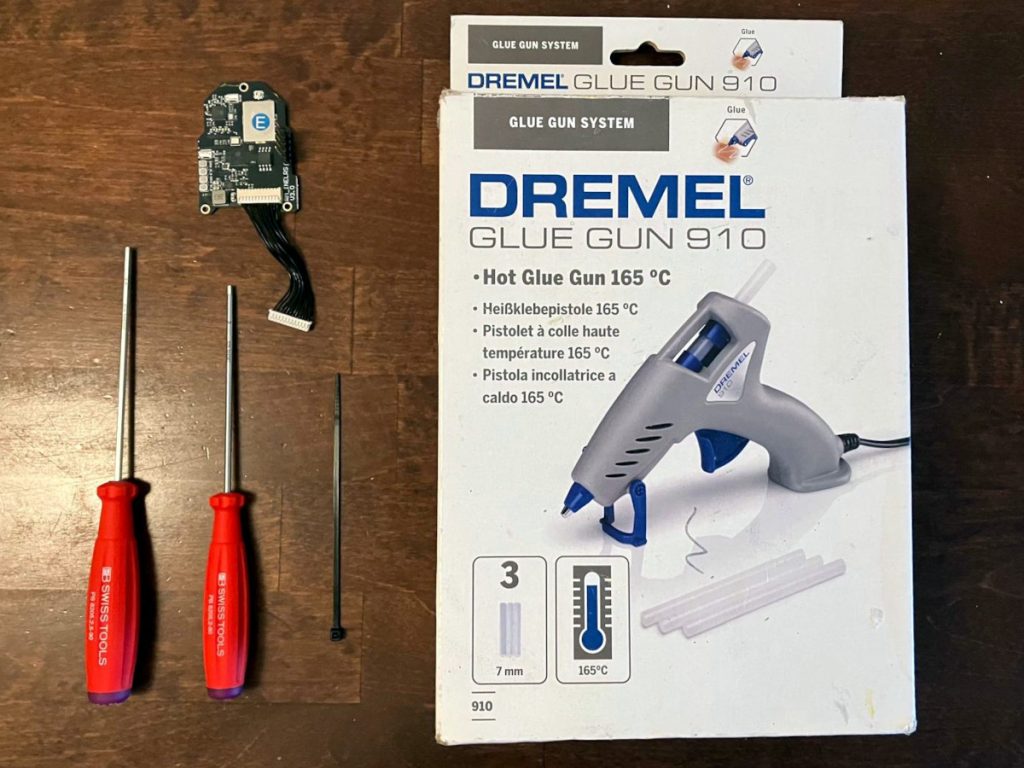
Tools and parts required
- 1.5mm Hex driver
- 2.0mm Hex driver
- Hot Glue gun
- small zip-tie
- Replacement internel ELRS RF module for TX16S
Removing the old RF module
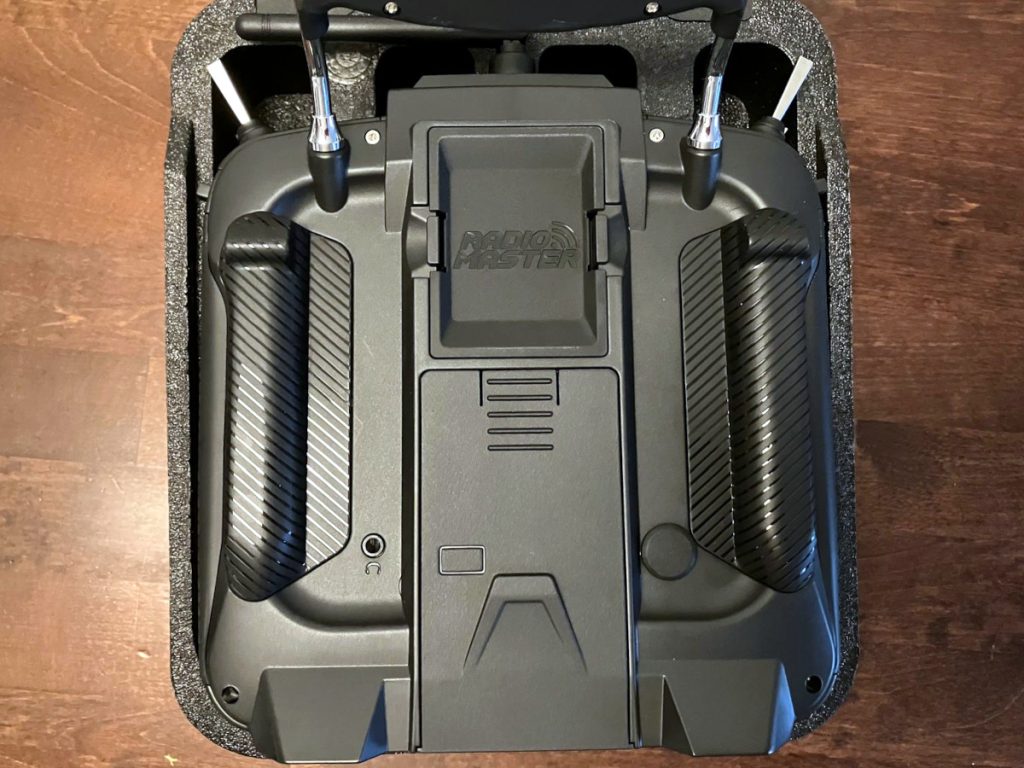
- Remove Battery cover and battery.
- Remove side grips and external RF module bay cover

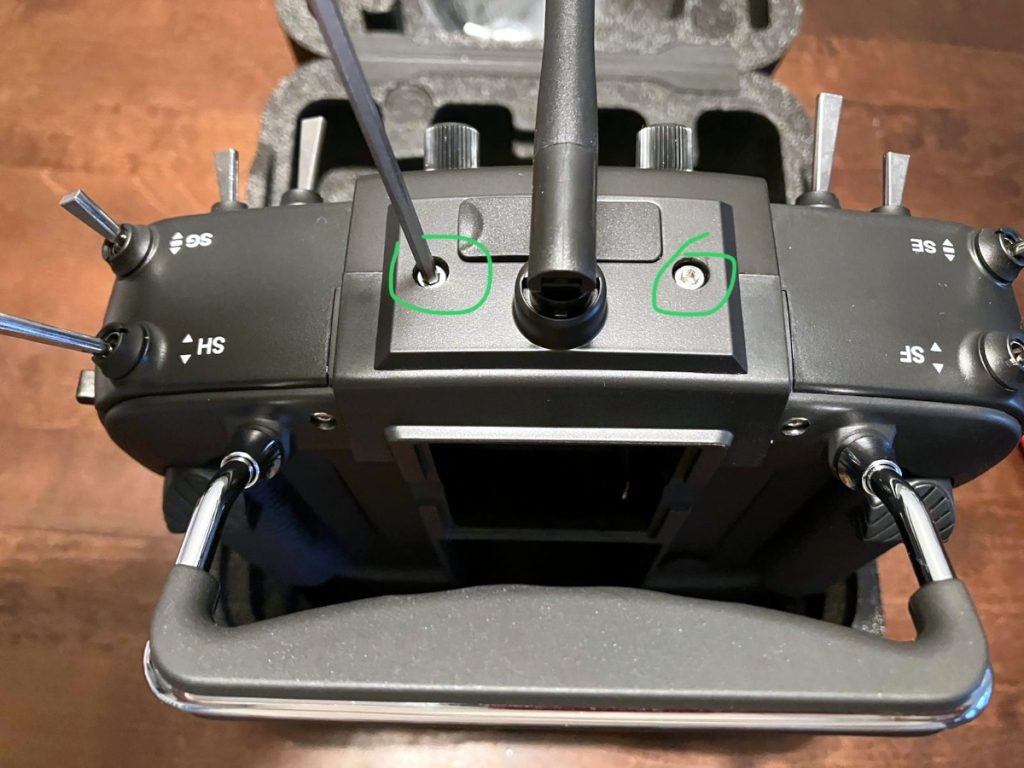
- Remove 2 screws next to antenna.

- Remove 4 screws at the back.

- Carefully lift the back cover. There is one or two speaker cables connected between back cover and Main board. Disconnect them before taking apart the back cover.
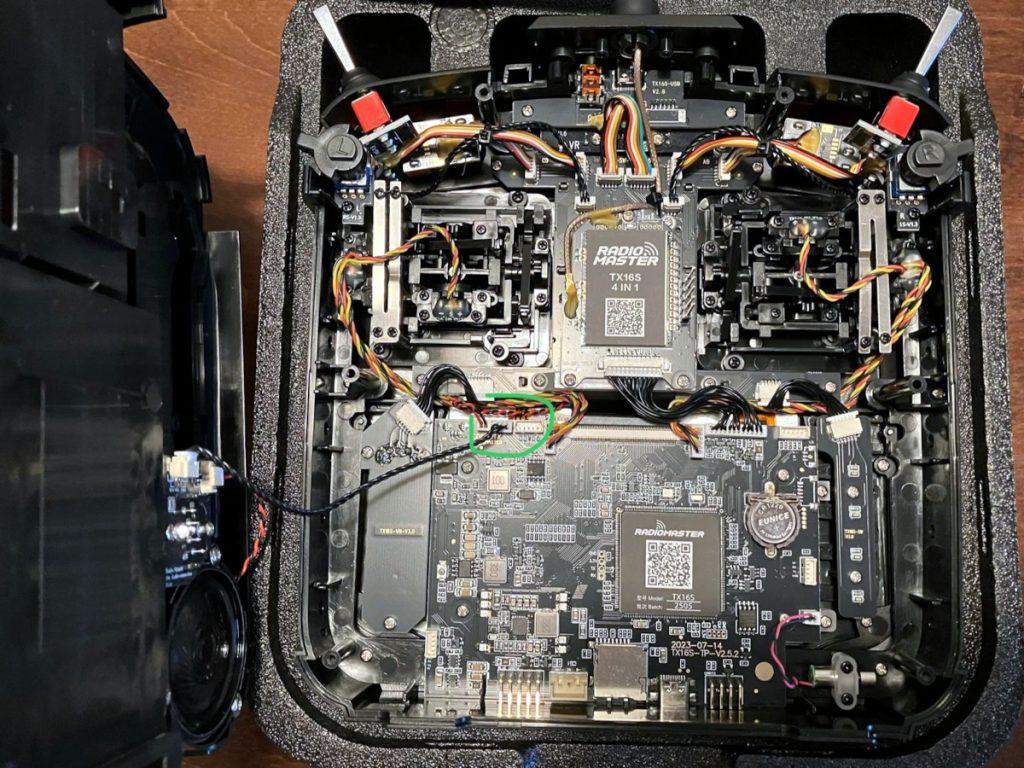
- Cut the zip-tie holding the antenna cable to the plastic frame. Be careful not to cut or crimp the antenna cable.
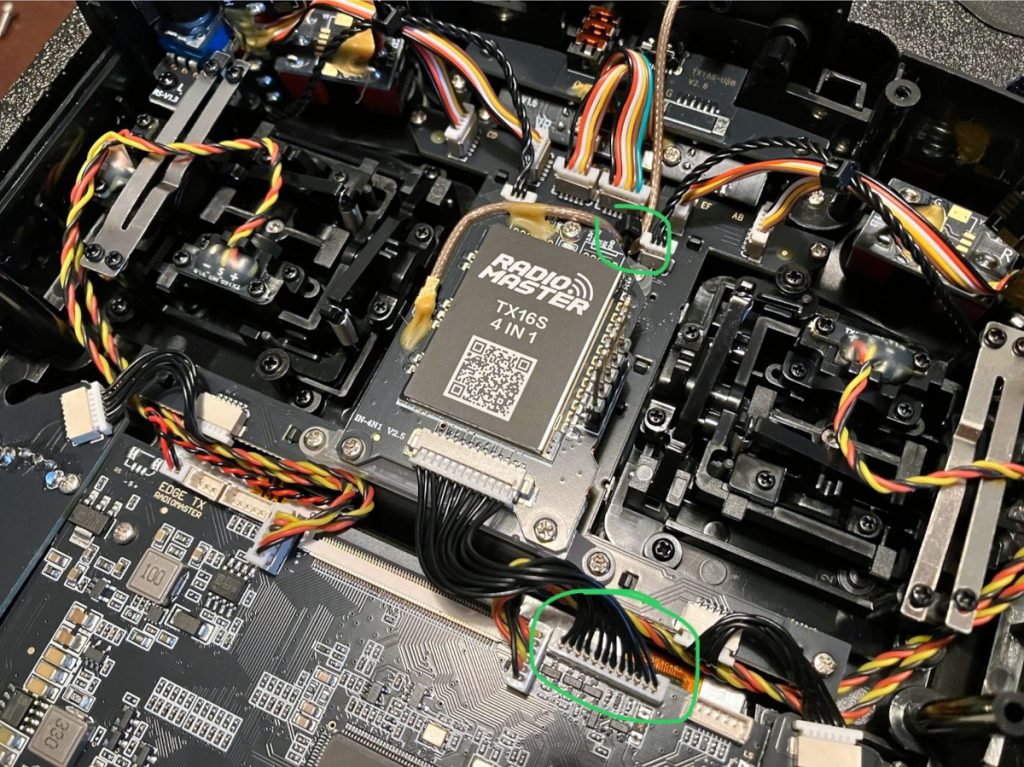
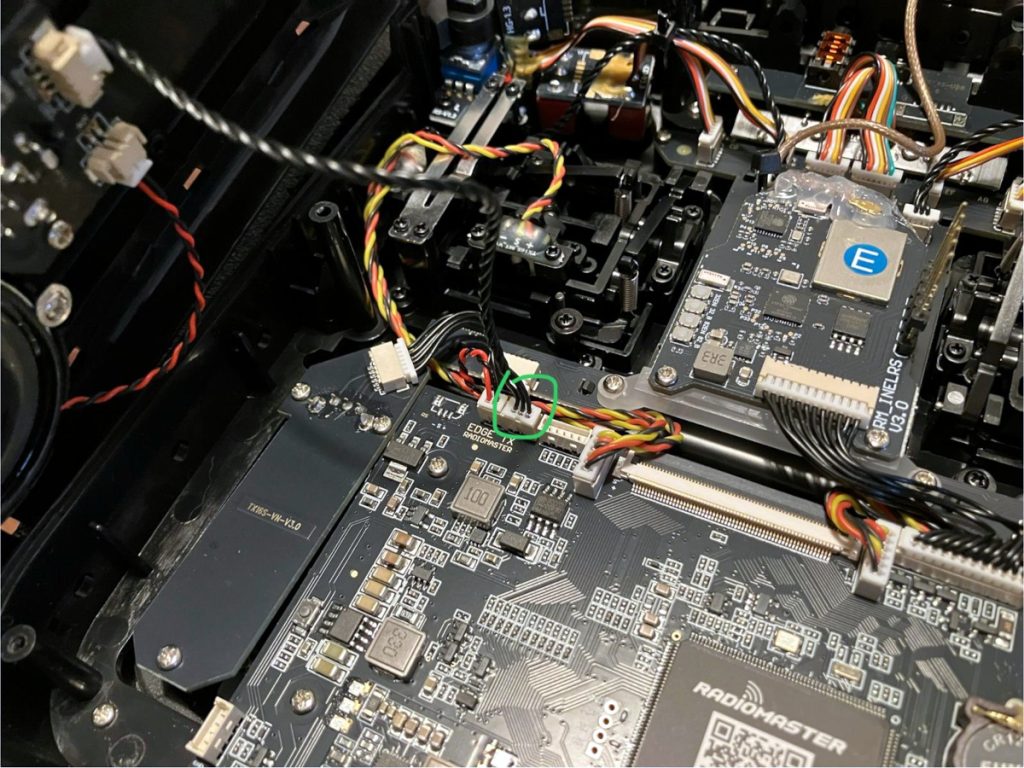
- Disconnect the RF board data cable from the main board. The new RF module comes with new cable attached.
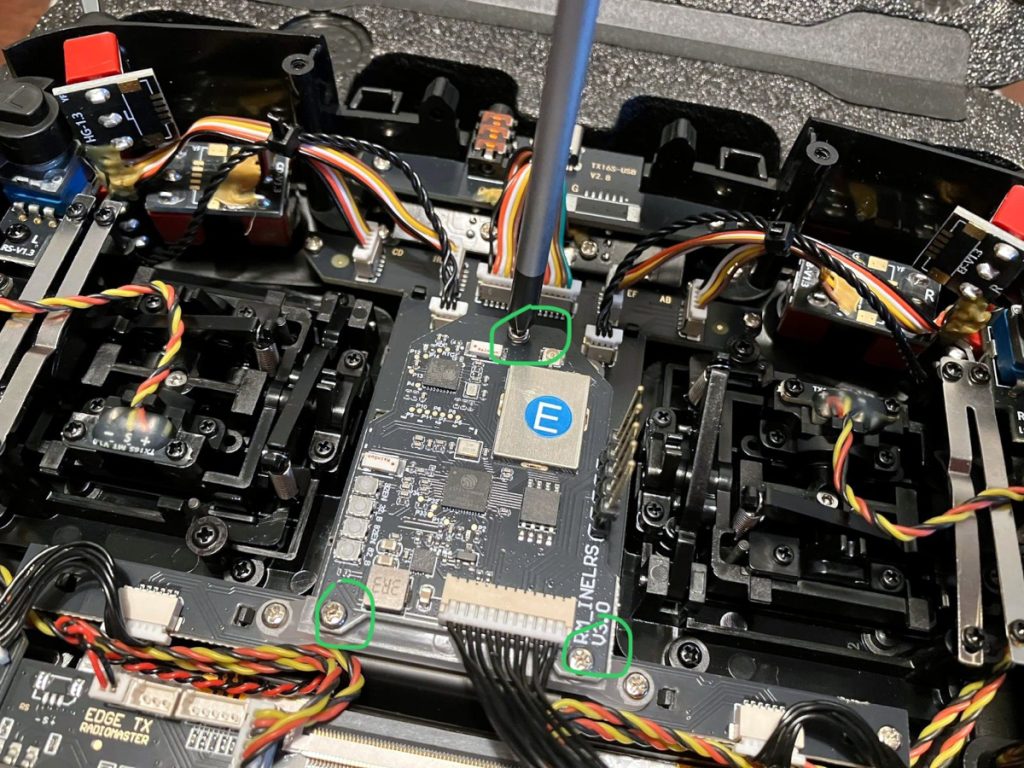
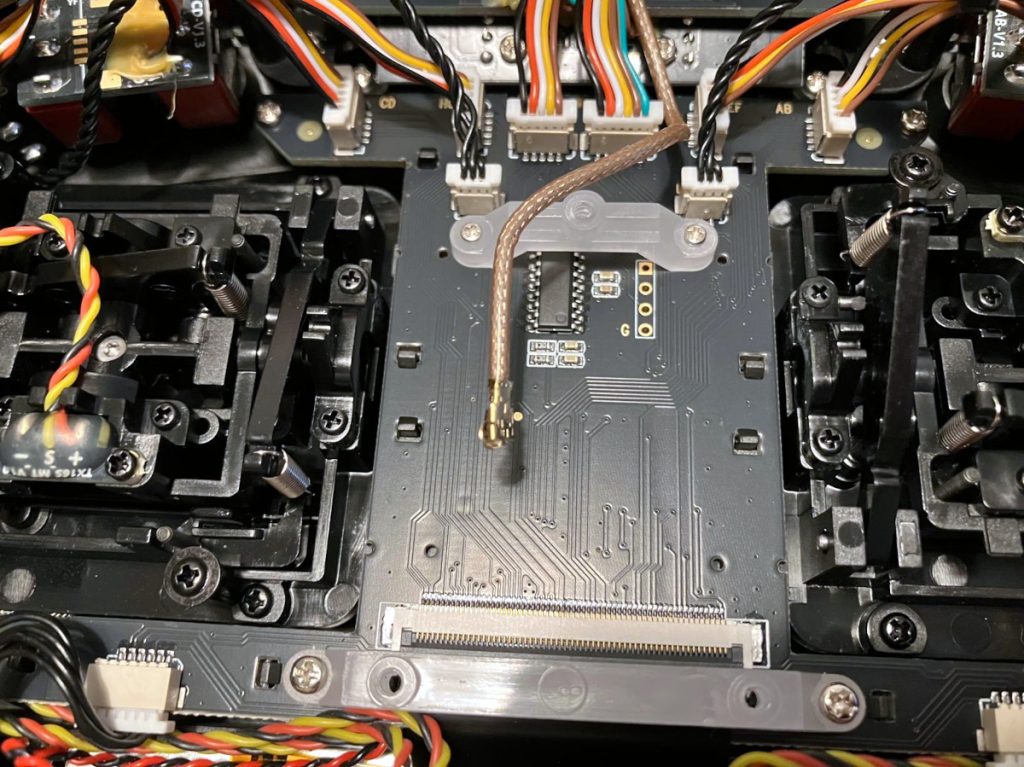
- Remove 3 screws from the the RF board.

- Carefully disconnect the SMA antenna connector from the RF board.
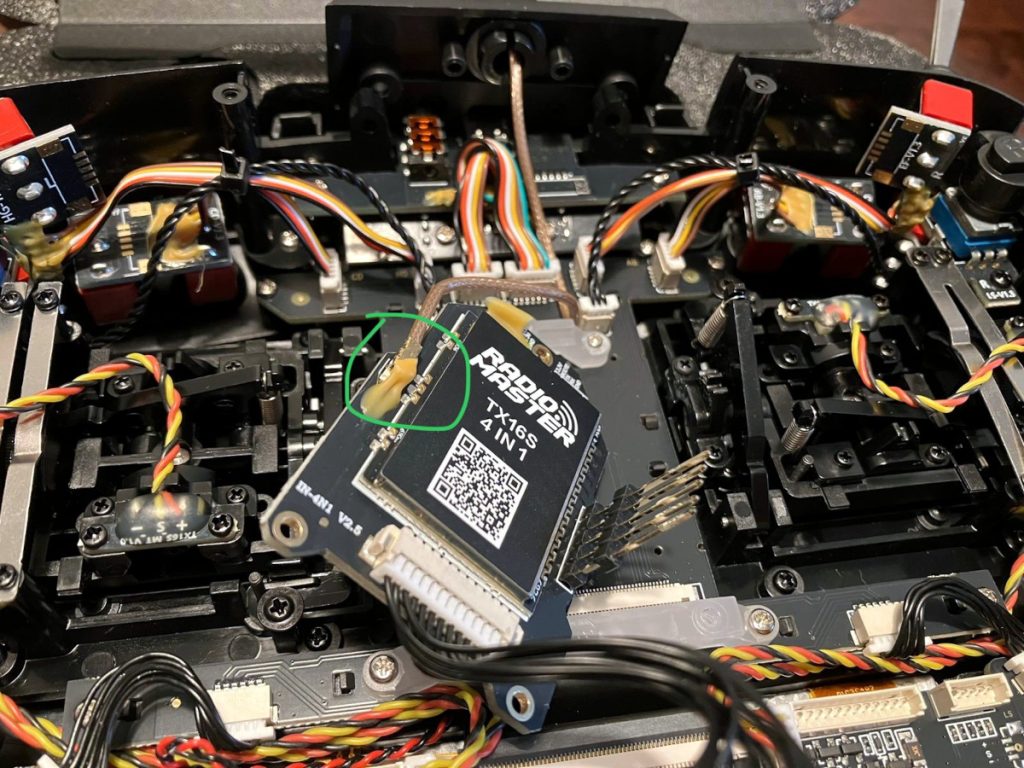
- Carefully remove all old glue from the SMA connector.
Installing the new ELRS RF module
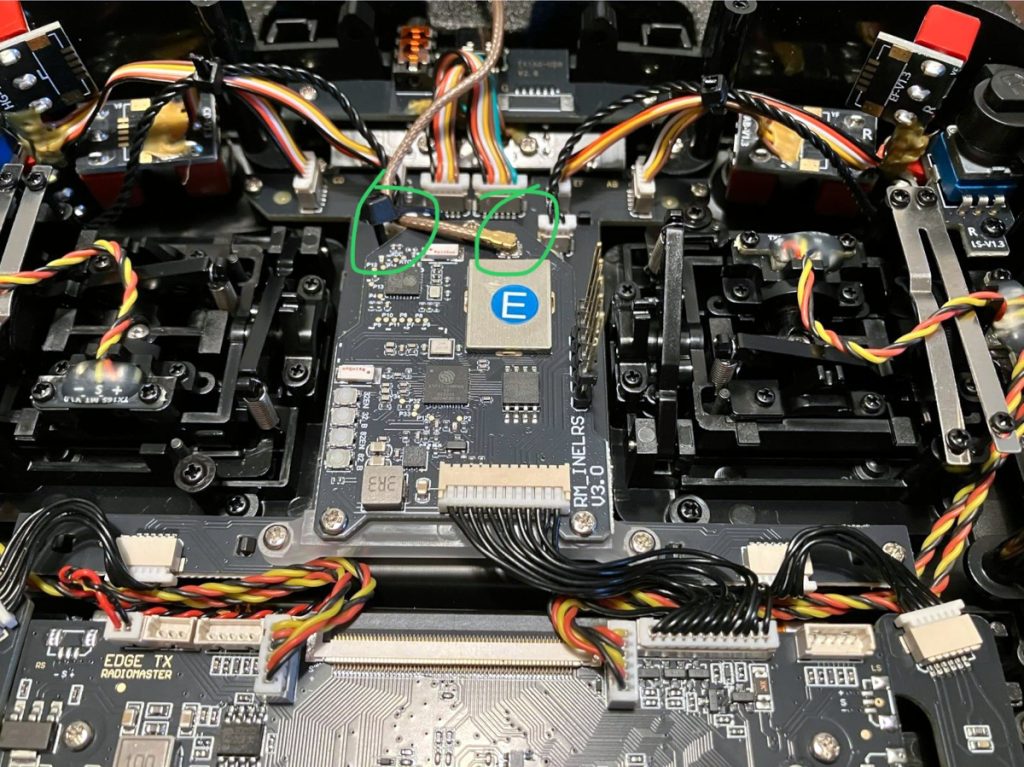
- Install the replacement ELRS RF module and install the 3 screws.
- Install the SMA antenna connector on the RF module.
- Put a zip-tie around the antenna cable and RF board mount to give some strain relief to the antenna SMA connection.
- Put some hot glue on the SMA connector to ensure it doesn’t easily come off during use.
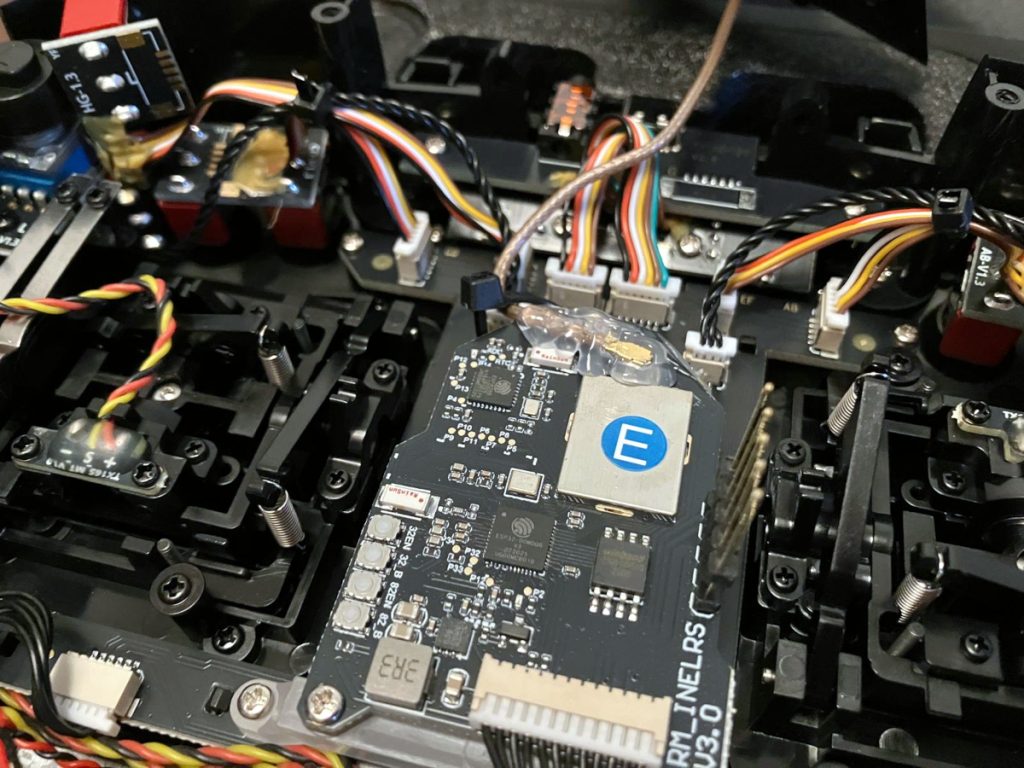
- Connect the RF data cable to the main board.

- Install the back cover, be sure to attach the speaker cables to the main board.
- Install 4 screws on the back cover.

- Install 2 screws on the antenna holder.
- Fix the side grips, RF bay cover, Battery and Battery cover
Update Edge TX settings
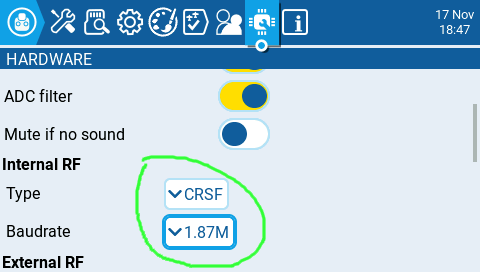
- Power ON the controller and go to Hardware settings. SYS->Hardware

- Scroll down to Internal RF and select CRSF. Choose preferred baud rate. e.g. 1.87M
- For each model, start the Express LRS app and choose required settings. SYS->Tools->ELRS

That’s it. We hope you found this guide helpful.