This guide will focus on connection setup with various commonly used receivers and ESCs.
Connectors
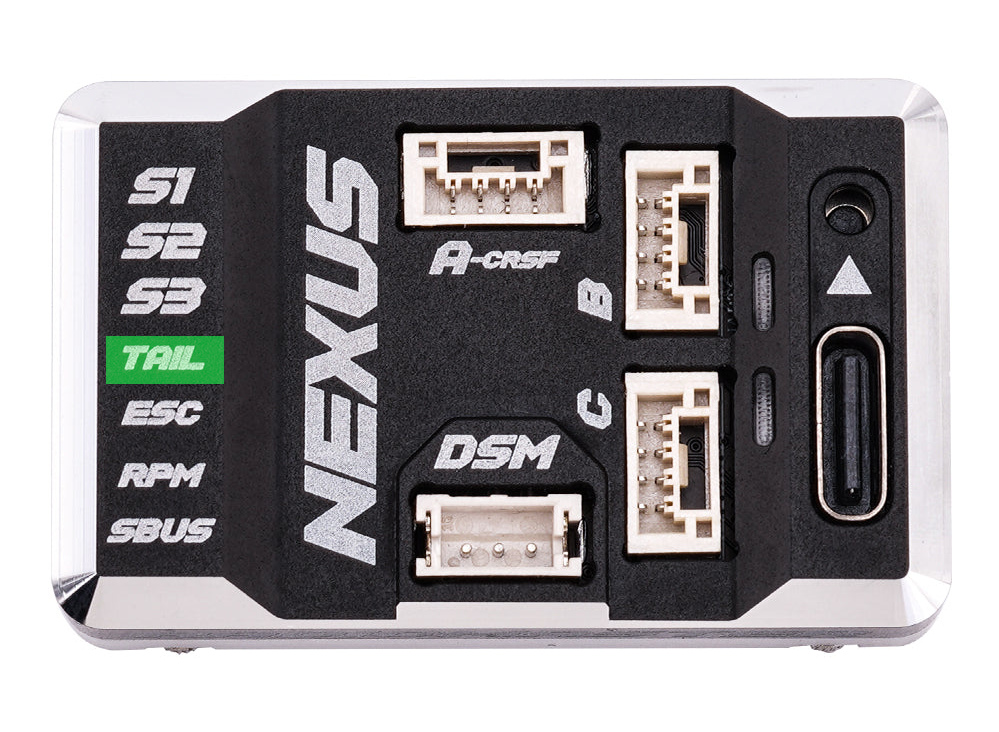
The below figure shows the available connectors on the Nexus FBL controller.

Receiver, Receiver Telemetry as well as ESC Telemetry use Serial ports. The Nexus has 5 Serial ports available on different connector types. Below table summarizes all of them.
| Port Name | Connector type | Typical Use | Connector Pigtail |
|---|---|---|---|
| A-crsf | JST-GH-4 | ELRS/Crossfire Receiver/Frsky F.Port | Provided with Nexus |
| B | JST-GH-4 | ELRS/Crossfire Receiver | Provided with Nexus |
| C | JST-GH-4 | ELRS/Crossfire Receiver | Provided with Nexus |
| DSM | JST-ZH-3 | SRXL / SRXL-2 Receiver / ESC Telemetry | Spektrum DSM Satellite connector pigtail |
| SBUS | JR | SBUS Receiver / ESC Telemetry | JR to JR Connector Lead |
Receiver connections
RotorFlight supports a number of Receiver protocols like Crossfire (CRSF), Frsky F.PORT, Futaba S.BUS, Spektrum DSM, SRLX 2, etc.
The Receiver can be connected to any of the Serial ports highlighted green in the below picture.

NOTE: SBUS port does not receive power from USB. Ports A/B/C and DSP receive power from USB. So it is recommended to connect the receiver to those ports as you can test the receiver when connected over USB without requiring extra power source over the Servo Ports.
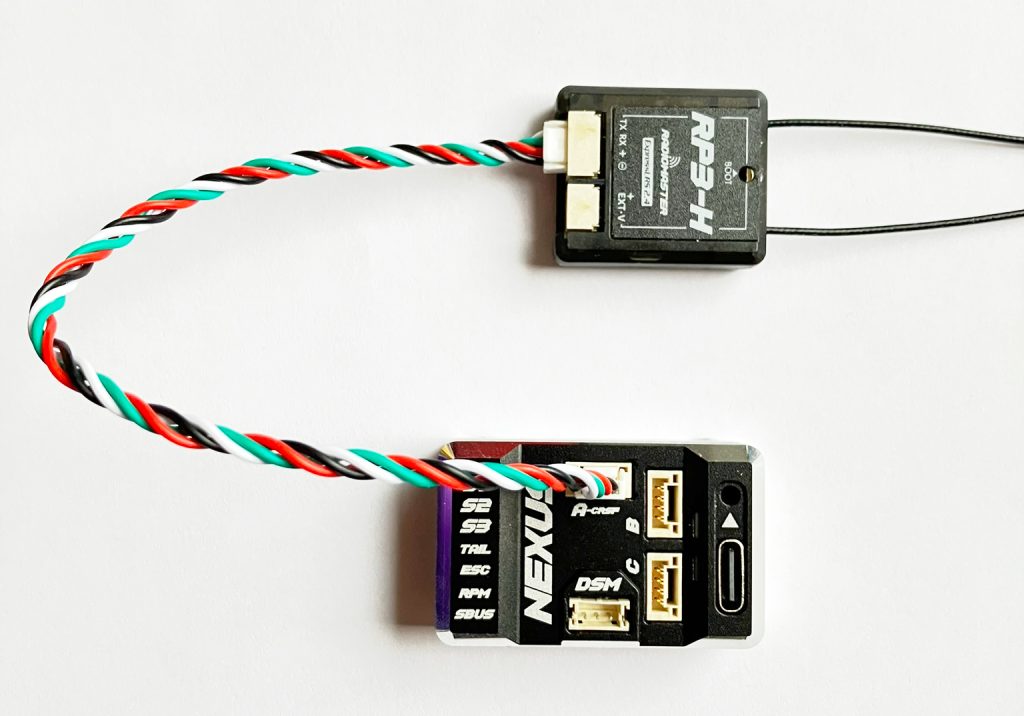
In the below picture, Receiver RP3-H is connected to Port-A. Denoted by Serial Rx. The connection cable is provided with the RP3-H receiver.
In the below picture, Receiver Frsky R-XSR is connected to Port-A. Denoted by Serial Rx. The receiver port adapter cable is provided with NEXUS controller.

In the configuration screen choose “Serial Rx” for the port you have connected the receiver to. In the above examples we have connected the receiver to Port A.

In the Receiver tab select the correct Receiver protocol. e.g. for RP3-H we select TBS CRSF (crossfire)

ESC Throttle connection
Connect the Throttle cable from the ESC to the ESC port on the Nexus controller.

Select the correct ESC throttle protocol. For Helicopter ESCs this is usually PWM protocol.

ESC Telemetry connection
Rotorflight 2 supports a number of ESC telemetry protocols like Scorpion, OMPHOBBY, YGE, Hobbywing, etc.
The ESC telemetry signal can be connected to any of the Serial ports highlighted green in the below picture.
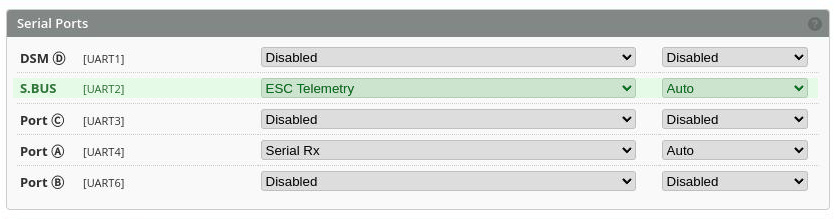
In the Configuration tab, enable ESC Telemetry for the appropriate port. In the below example, ESC Telemetry is enabled on SBUS Port.
In the Motors tab, select the correct ESC Telemetry protocol. In the below example we have selected OMPHobby.

Motor RPM connection
The Motor RPM signal from ESC or RPM sensor should be connected to the RPM port.

Enable RPM sensor toggle switch in the Motors tab in Rotorflight Configurator.

Swashplate Servo connection
First configure the correct servo configuration for the servos that you intend to use. This is done in the Servos tab.

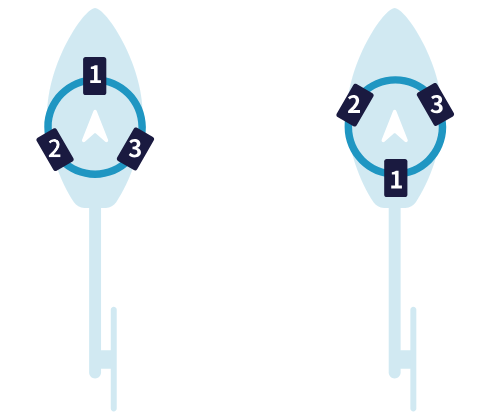
Connect the swash-plate servos to S1, S2 and S3 ports on the Nexus according to your helicopter’s swash-plate mechanical layout. Below is an example of popular servo layouts. For more servo layouts refer to Rotorflight wiki.

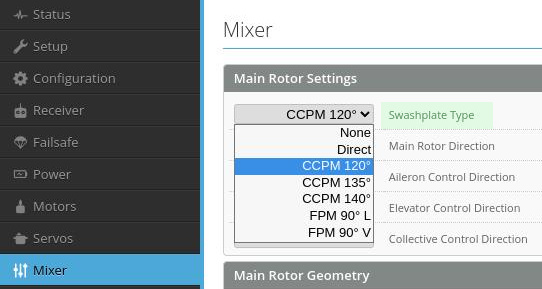
In the Rotorflight Mixer tab select the correct Swashplate type.
Tail Servo connection
Connect the tail servo to the TAIL port on the Nexus.
We hope this guide helped you to wire up your Nexus controller. For more details on how to setup the Nexus software configuration for you helicopter you can refer to Nexus setup videos on Youtube.